Snowflake
Snowflake has issued a deprecation notice for single-factor password authentication. Rill supports and recommends using private key authentication to avoid any disruption of your service.
Overview
Snowflake is a cloud-based data platform designed to facilitate data warehousing, data lakes, data engineering, data science, data application development, and data sharing. It separates compute and storage, enabling users to scale up or down instantly without downtime, providing a cost-effective solution for data management. With its unique architecture and support for multi-cloud environments, including AWS, Azure, and Google Cloud Platform, Snowflake offers seamless data integration, secure data sharing across organizations, and real-time access to data insights, making it a common choice to power many business intelligence applications and use cases. Rill supports natively connecting to and reading from Snowflake as a source using the Go Snowflake Driver.
Local credentials
When using Rill Developer on your local machine (i.e., rill start), Rill will use the credentials passed via the Snowflake connection string in one of several ways:
- As defined in the source YAML configuration directly via the
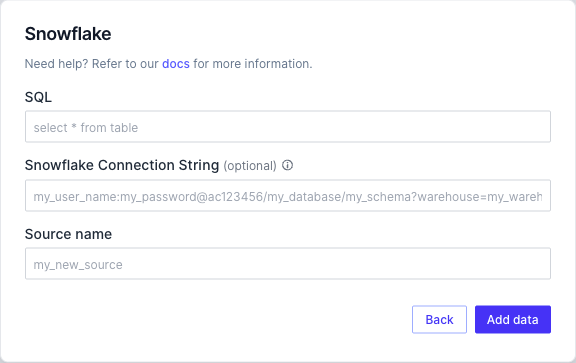
dsnproperty - As defined in the optional Snowflake Connection String field within the UI source creation workflow (this is equivalent to setting the
dsnproperty in the underlying source YAML file) - As defined from the CLI when running
rill start --env connector.snowflake.dsn=...
Outside of local development, it is generally not recommended to specify or save the credentials directly in the dsn of your source YAML file, as this information can potentially be committed to Git!
Rill uses the following syntax when defining a connection string using a private key:
<username>@<account_identifier>/<database>/<schema>?warehouse=<warehouse>&role=<role>&authenticator=SNOWFLAKE_JWT&privateKey=<privateKey_base64_url_encoded>
See the full documentation to set up private key authentication.
To determine your Snowflake account identifier, one easy way is to check your Snowflake account URL. The account identifier to use in your connection string should be everything before .snowflakecomputing.com!
If this project has already been deployed to Rill Cloud and credentials have been set for this source, you can use rill env pull to pull these cloud credentials locally (into your local .env file). Please note that this may override any credentials you have set locally for this source.
Cloud deployment
When deploying a project to Rill Cloud (i.e., rill deploy), Rill requires credentials to be passed via the Snowflake connection string as a source configuration dsn field or by passing/updating the credentials used by Rill Cloud directly by running:
rill env configure
Note that you must first cd into the Git repository from which your project was deployed before running rill env configure.
If you've already configured credentials locally (in your <RILL_PROJECT_DIRECTORY>/.env file), you can use rill env push to push these credentials to your Rill Cloud project. This will allow other users to retrieve and reuse the same credentials automatically by running rill env pull.
Appendix
Using keypair authentication
Rill supports using keypair authentication for enhanced security when connecting to Snowflake, as an alternative to basic authentication. Per the Snowflake Go Driver specifications, this will require the following changes to the dsn being used (note the authenticator and privateKey key-value pairs):
Snowflake currently does not support encrypted keys for their Snowflake driver.
<username>@<account_identifier>/<database>/<schema>?warehouse=<warehouse>&role=<role>&authenticator=SNOWFLAKE_JWT&privateKey=<privateKey_base64_url_encoded>
If using keypair authentication, consider rotating your public key regularly to ensure compliance with security and governance best practices. If you rotate your key, you will need to follow the steps below again.
Generate a private key
Please refer to the Snowflake documentation on how to configure an unencrypted private key to use in Rill.
Generate a Base64 URL-safe encoded version of your private key
Following similar steps, you will first need to generate a Base64 URL-safe encoded version of your private key:
cat rsa_key.p8 | base64 | tr '+/' '-_' | tr -d '\n'
Depending on your OS version, the command to generate a Base64 URL-safe encoded version of your key may differ slightly. Please check your OS reference manual for the correct syntax.
Before copying this output (for the next step), make sure the resulting string does not end with a %. To double-check, you can try writing the results to a text file and manually checking: cat rsa_key.p8 | base64 | tr -d '\n' > private_key.txt.
Update Snowflake DSN with encoded private key in Rill
Take the output of the previous step and update the DSN accordingly in your source definition:
<username>@<account_identifier>/<database>/<schema>?warehouse=<warehouse>&role=<role>&authenticator=SNOWFLAKE_JWT&privateKey=<privateKey_base64_url_encoded>
The Base64 URL-safe encoded private key should be added to your privateKey parameter.