2. Import the Source
Let's start at the beginning of all data pipelines: the source.
What is a Source?
In Rill, a source model represents your raw data. See our list of connectors or select Add -> Add Data from Rill Developer to see the supported sources.

Depending on the source type, you will need to either explicitly provide credentials (for Snowflake, Athena, etc.) or Rill can dynamically retrieve them via the CLI (for AWS, GCP, Azure). In either case, the credentials needs to be stored in a .env file in order to be pushed to your deployed projet. You might need to run rill env configure after deploying if your credentials are not pushed properly.
By default, Rill uses DuckDB as the underlying OLAP engine (see Connect OLAP engines). Please see our docs for the supported list of connectors.
We support various different OLAP engines. If you have a different OLAP engine that you're interested in using, please let us know! Looking for ClickHouse tutorial? Click [Here!] (/tutorials/rill-clickhouse/)
Add a Data Source
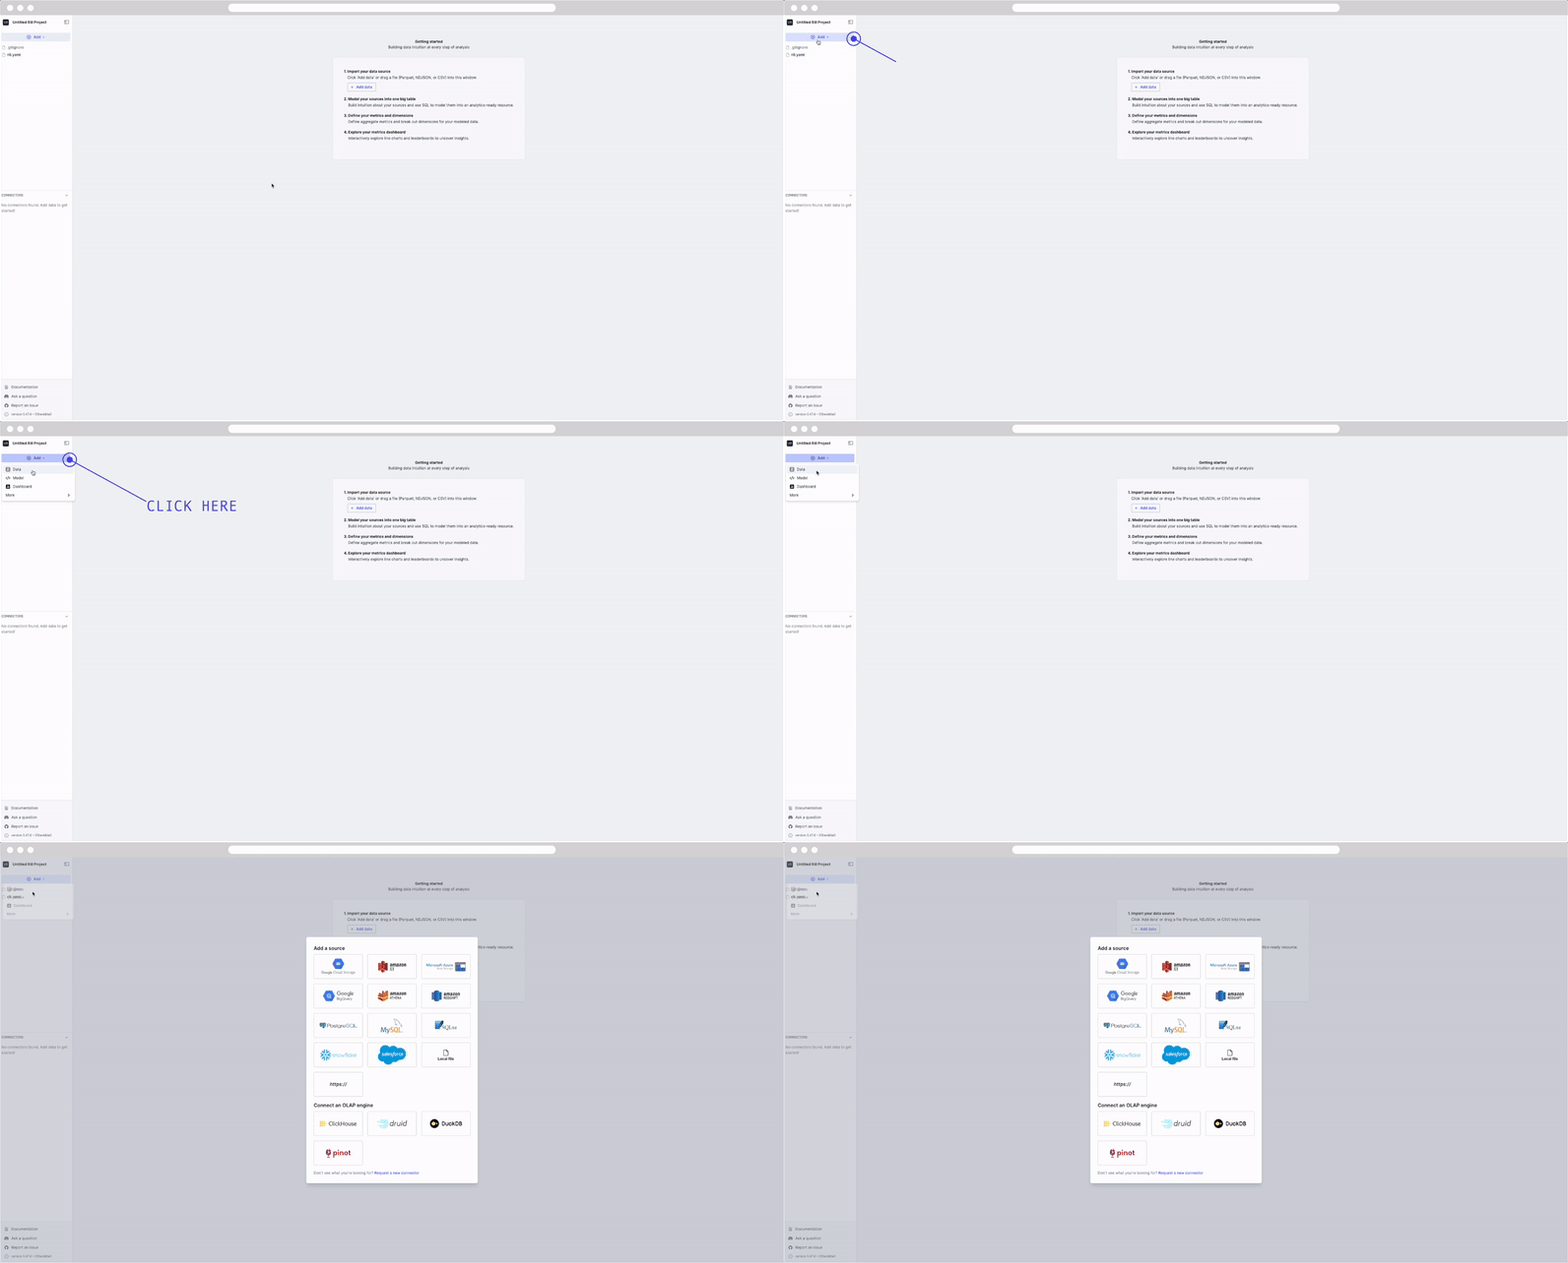
Select the +Add dropdown and select Data. This will open a UI showing supported connectors.

For our tutorial, let's add two GCS storage sources from our public storage.
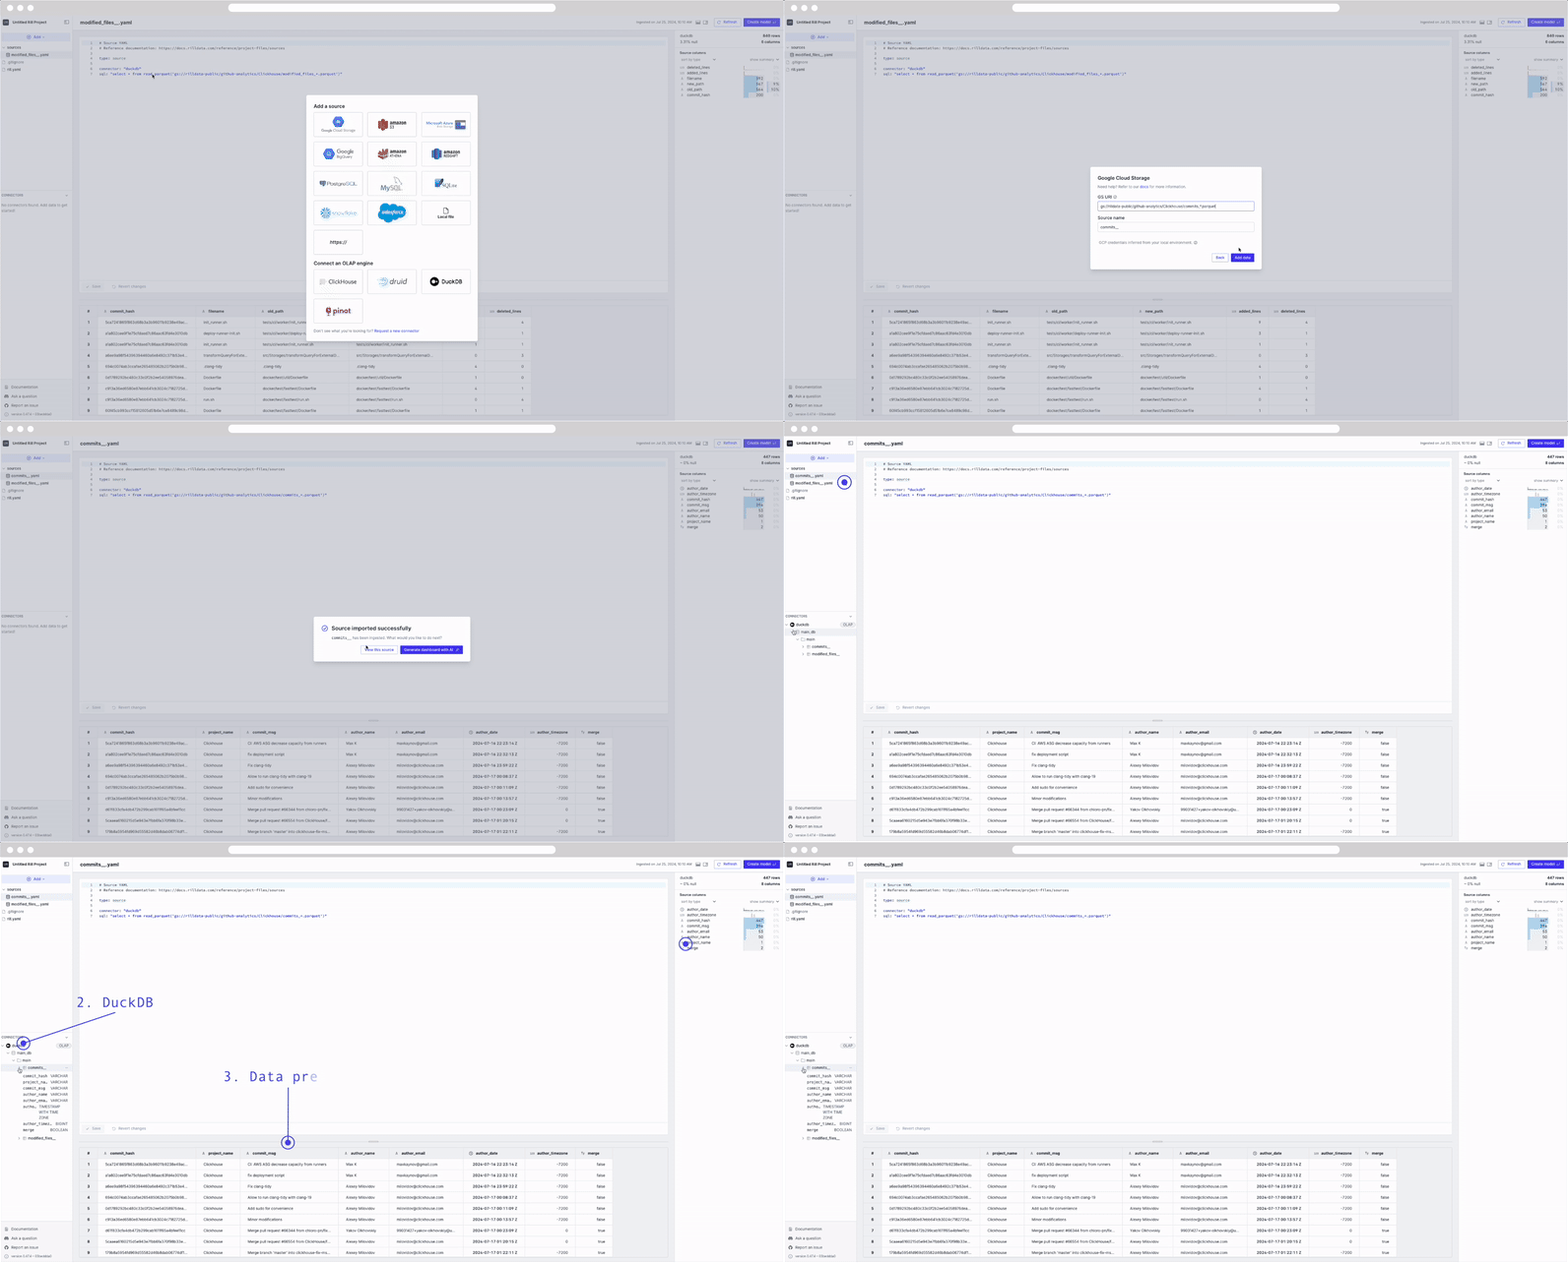
In Rill, each dataset is added separately as a single source model. Once imported into Rill, you can then transform the data via SQL modeling (we'll cover that on the next page). Follow the steps in the UI and use the following URIs below.
gs://rilldata-public/github-analytics/Clickhouse/2025/03/modified_files_*.parquet
gs://rilldata-public/github-analytics/Clickhouse/2025/03/commits_*.parquet
These are datasets derived from the commit history and modified files of our friends at ClickHouse's GitHub repository. In our example, we'll ingest a single month of data. However, Rill supports glob patterns, so you could modify the URL to gs://rilldata-public/github-analytics/Clickhouse/**/modified_files_*.parquet to ingest all years and months of data. However, that's a lot of data to ingest! We discuss [incremental modeling] (/tutorials/rill_developer_advanced_features/incremental_models/cloud-storage-partitions) in a future lesson.
Once imported, you'll see the UI change with several things:
- A
source_name.yamlfile created in the file explorer. - A DuckDB database created in the Connectors explorer.
- Within the DuckDB database, under main, the source table with a preview when selected.
- The right panel showing a summary of the data source and column values.

Now we're ready to create a model.
Don't see what you're looking for?
We are continually adding new sources and connectors in our releases. For a comprehensive list, you can refer to our connectors page. Please don't hesitate to reach out if there's a connector you'd like us to add!
If this is your first time, you may need to refresh the browser for DuckDB to appear in the UI.
By default, all environments running locally are considered dev environments. This means that you can use environmental variables to filter the input data, as Rill Developer is designed for testing purposes. For example, you can filter the repository data on the author_date column or simply use limit ####.
sql: "select * from read_parquet('gs://rilldata-public/github-analytics/Clickhouse/*/*/commits_*.parquet')
         {{if dev}} where author_date > '2025-05-01' {{end}}"