Set up MCP and more!
Connecting your Rill project to your AI Agent has never been easier!
Prerequisites
Before you begin, make sure you have:
- An MCP Client (Claude Desktop, ChatGPT Desktop, etc.)
- Access to a Rill Project
For detailed steps, please refer to our documentation on MCP Servers
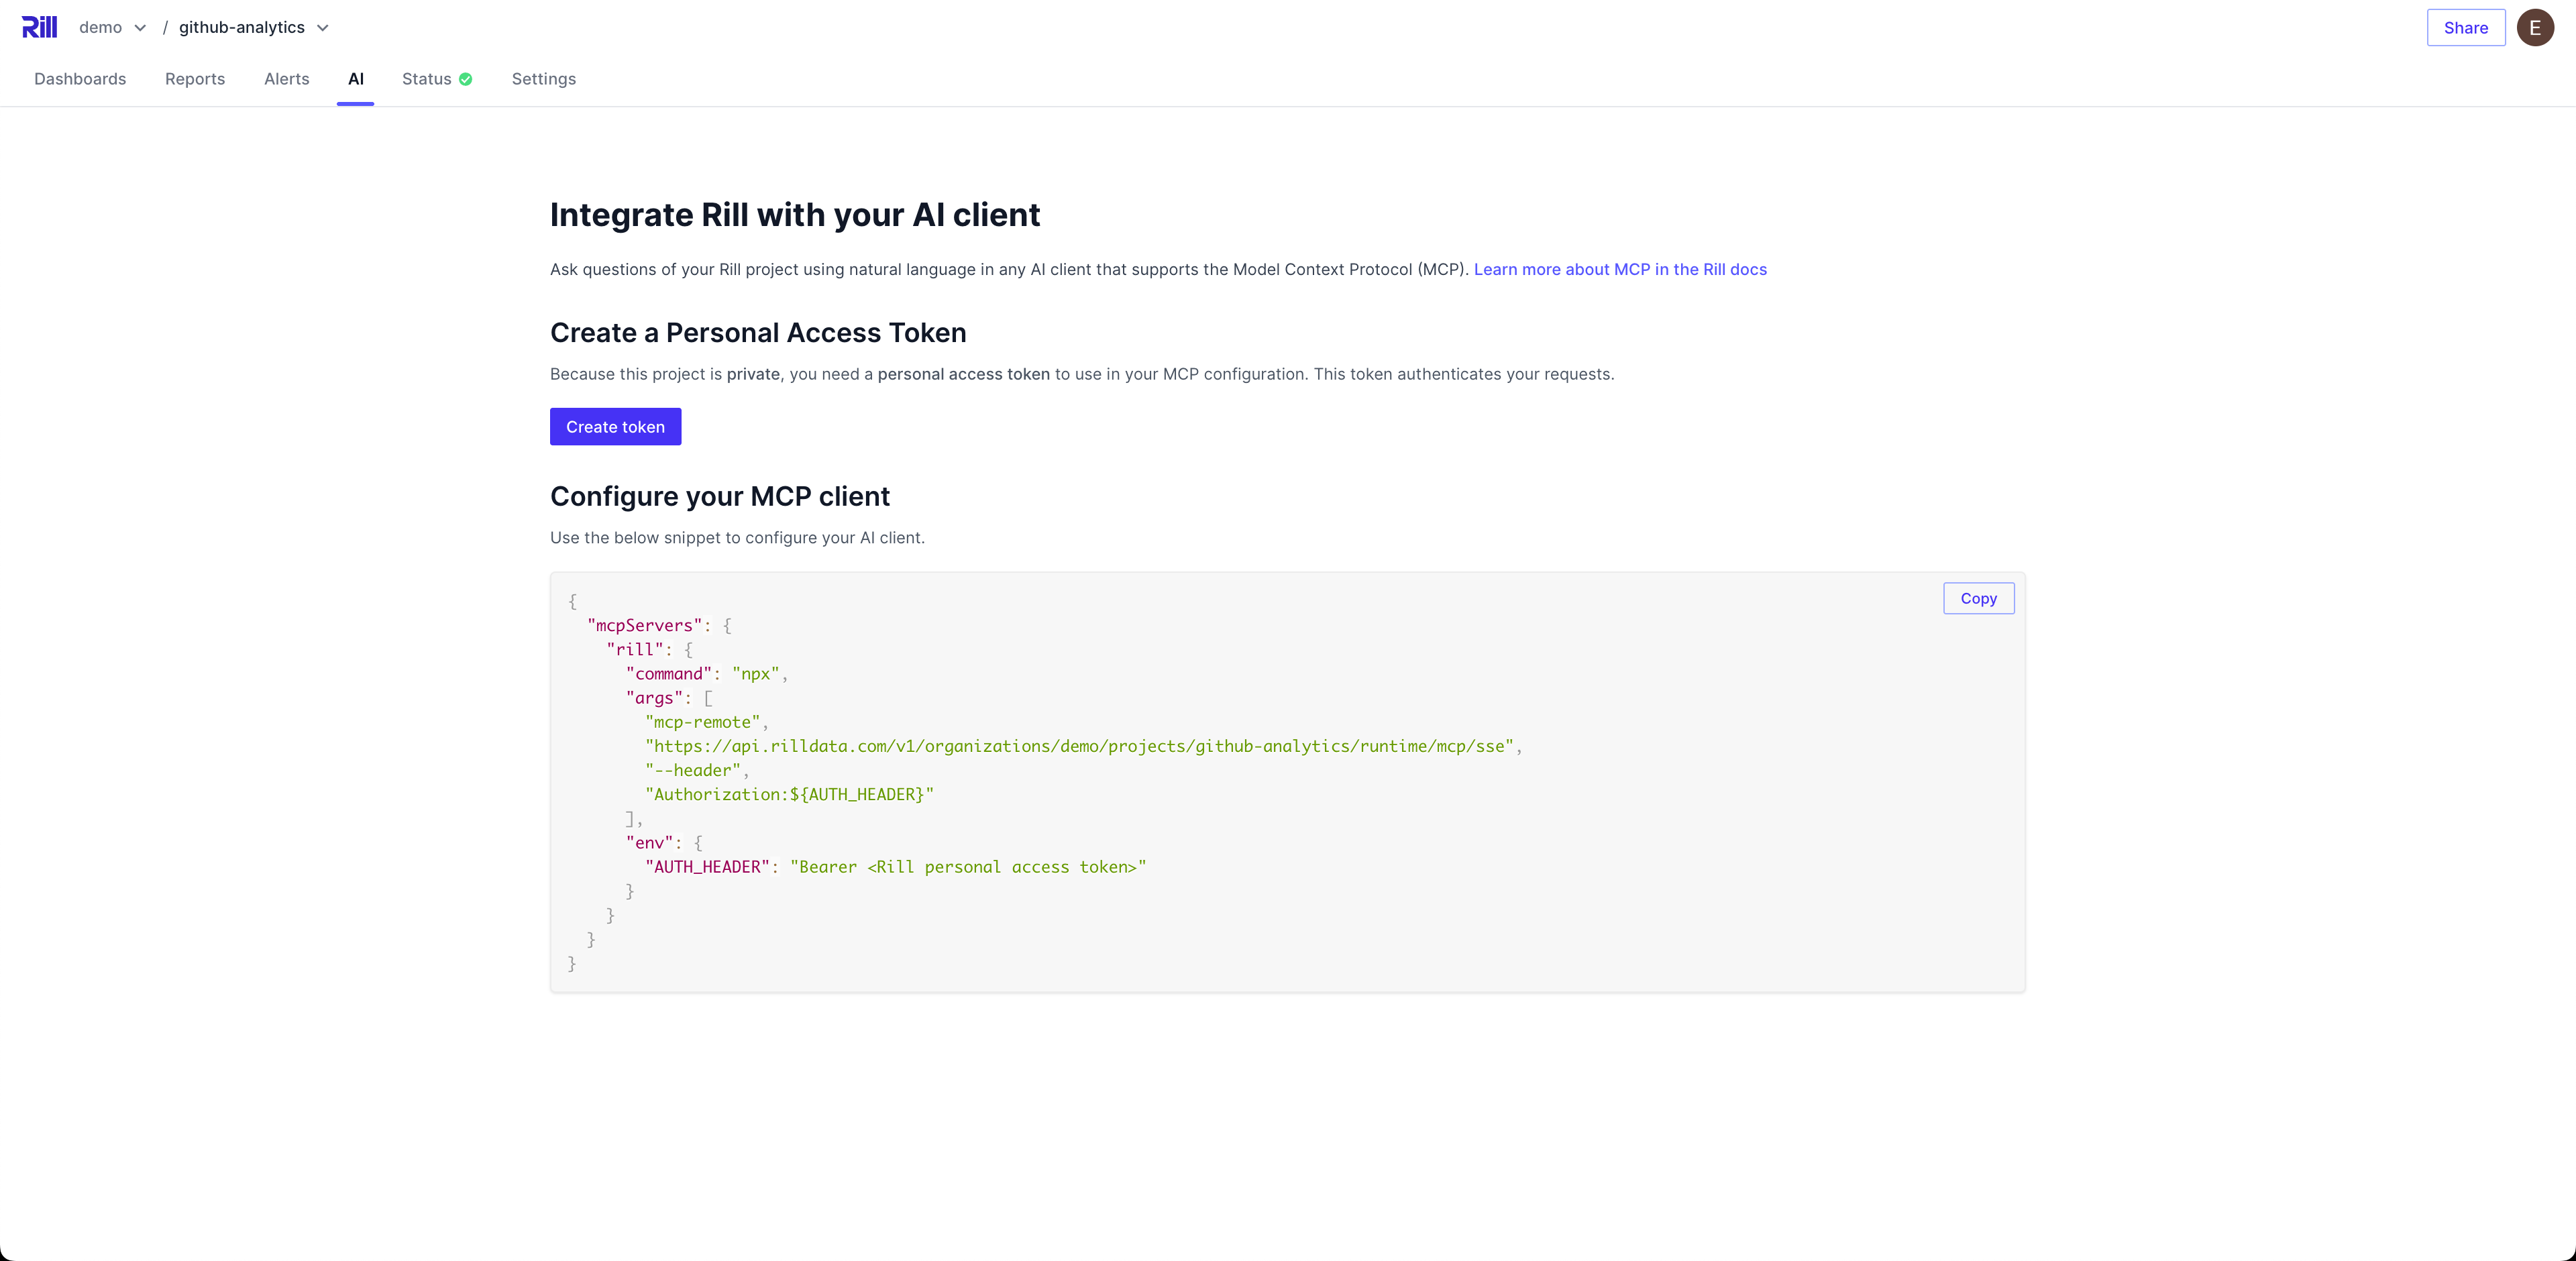
Step 1: Access your Rill Project's AI tab.

In your project's AI tab, you'll be able to create a user token (personal access token) and copy the MCP config.json directly in the UI. Simply paste this into your application of choice.
For details on creating, managing, and using personal access tokens, see User Tokens.
Step 2: Add config.json into Client
Depending on your client application, paste the config from step 1.
- Anthropic's Claude Desktop Documentation
- OpenAI's ChatGPT Documentation
- Cursor Documentation
- Windsurf Documentation
Working with OpenAI's ChatGPT
To use Rill with OpenAI's ChatGPT, you'll need to follow the same steps as above to set up your MCP connection. Once that's done, you can start querying your Rill metrics directly from ChatGPT interfaces.
- Import your remote MCP servers directly in ChatGPT settings or in the desktop application navigate to settings by clicking on your profile picture in the bottom left corner.
- Connect your server in the Connectors tab. You may have to add the server as a source with the create button.
Note: You may need at least the
Plusplan to access connectors.
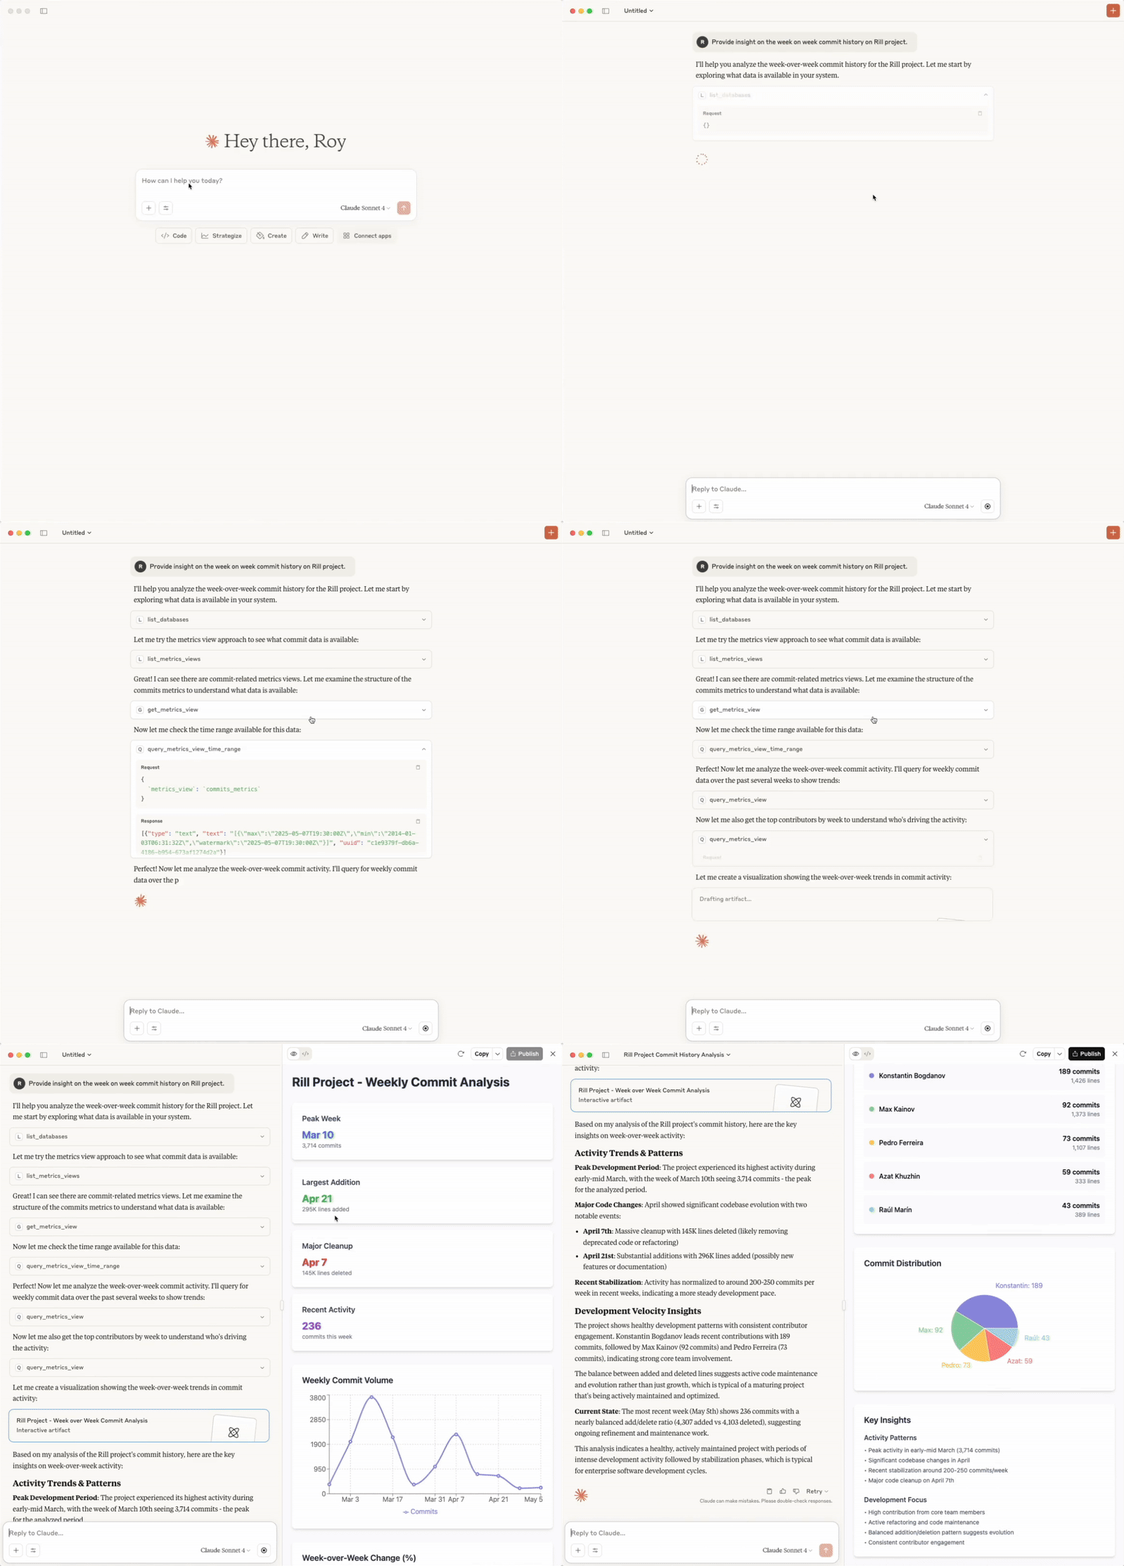
Step 3: Start Querying your Agent about your Rill metrics.
A below is an example chat with Claude using our MCP server to get information on the commit history for one of our demo projects.

Step 4: Agent Customization
If you watched the whole clip above, you'll see that Claude tries to code a web app to visualize the information it found, but you'll notice it takes time (fast-forwarded in the clip). Instead, you can provide the Agent with context and instructions on how you'd like the Agent to behave.
I highly recommend taking a look at our series of videos on Conversation BI with Claude and Rill.