GitHub Basics
Overview
This page makes the deploy process easier for those who are less familiar with GitHub by walking you through the steps to use the UI rather than the GitHub command line interface. Much simpler for those who prefer a graphic interface!
To share dashboards with other users, Rill utilizes GitHub as a means of version control - effectively creating BI-as-code. There are several advantages to Git as the backend for dashboards: develop locally, integrate into existing development workflows, and manage versions + change control. While many users are familiar with Git and basic commands, there are other Rill users who are relatively new to Git.
In this section, we will outline:
- Installing the GitHub Desktop app (recommended for those less familiar with Git versus using the command line)
- Setting up your repository (repo) and cloning to your local
- Pushing changes to Git
- Deploying Rill to your new org to share dashboards, set up alerts and receive scheduled reports

Installing Git
-To download the GitHub app for a UI driven workflow, visit the install site here.
- In your computer's Downloads folder, double-click the GitHub Desktop zip file.
- After the file has been unzipped, double-click the GitHub Desktop application file.
- GitHub Desktop will launch after installation is complete.
If you do not already have a GitHub account, you'll need to create one as part of this process. For those looking to deploy to a company repo, we would suggest requesting access to a specific repo where you can get started.
Cloning Locally
Once you have downloaded GitHub and connected your account, you'll be able to create a new repository. Think of the repository as a shared cloud drive for the configuration files (sources, models, dashboards) that power Rill.
-
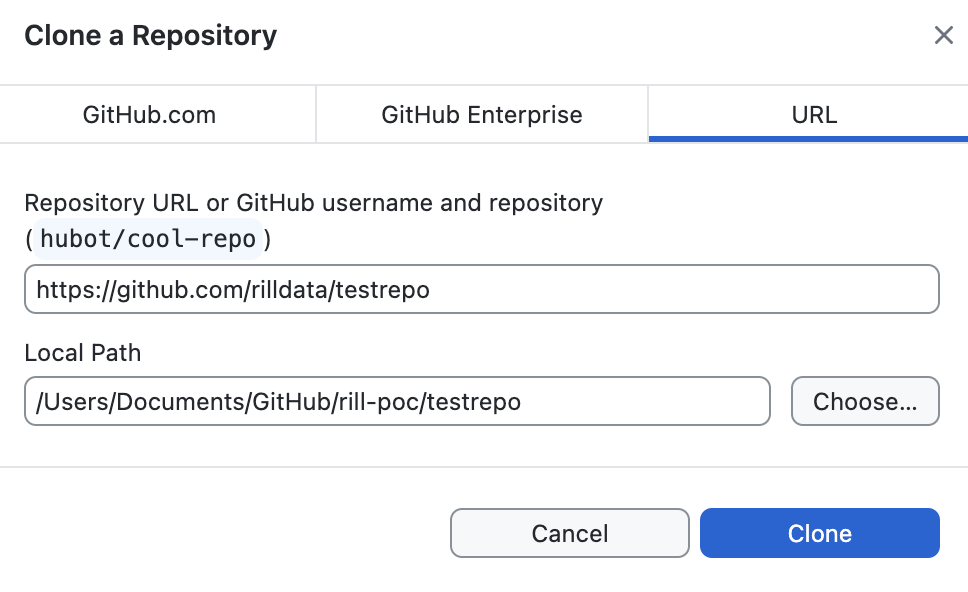
First, go to GitHub.com and create a new repository - clicking the
Newbutton on the homepage
-
After you name your respository and click save, you'll see the option to
Set up in Desktop. This will open the GitHub desktop app directly to "clone" the repo to your local computer
-
Select the folder on your computer where you'd like to build with Rill. Confirm the location you cloned for the next step.
-
Open the Terminal and go to your local copy of the repo (e.g. the above would be
cd Documents/GitHub/rill-poc/testrepo) -
Run the Rill install command
curl https://rill.sh | sh(or runrill startif you've already installed)
Now - any changes you make locally can be synced directly with your GitHub repo in one click! You can revisit our build section for refreshers on connecting to new sources, modeling data, or building dashboards.
Pushing Changes
After installing Rill and adding sources, your local project will now contain a variety of new files - source definitions, SQL models for transformation, and dashboards for analysis. GitHub automatically recognizes those files as new and you can now push those changes to your cloud repository.
First, open the GitHub app and select your repo. You should now see a variety of new changes (that can then be committed):
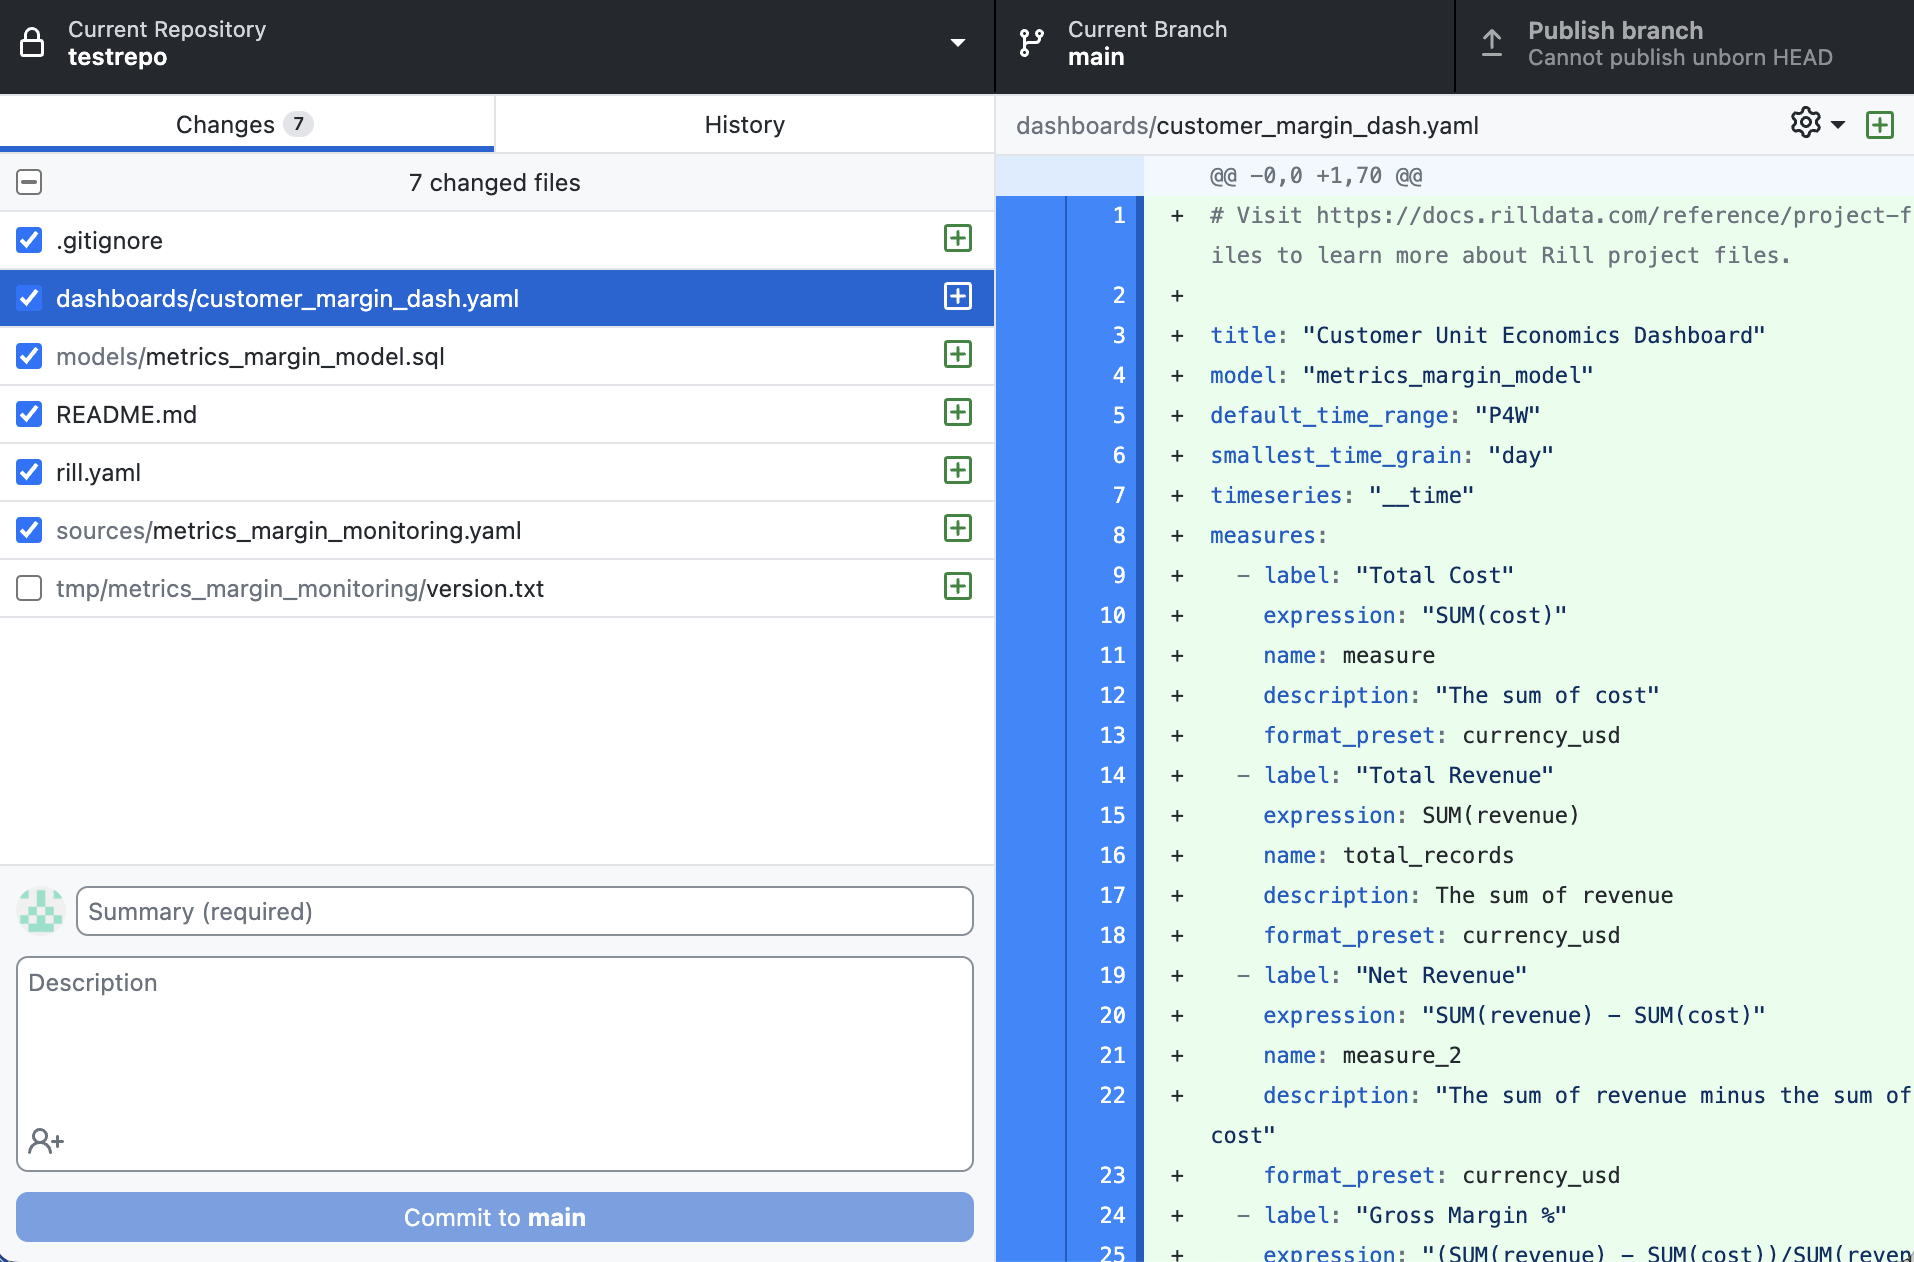
Now, in order to actually commit these changes to your repo, you can take the following steps:
- On the bottom left, you can describe the changes (or add something like "initial commit")
- Select the now blue Commit to main button on the bottom left
- Click Publish Branch on the top right - and that's it. Any future changes would follow the same two steps - add a comment, commit and publish!
During the commit process, make sure to uncheck files you do not wish to sync to your cloud repo (or add the appropriate exclusions in your .gitignore file). In particular, if you were working with local data files, those will now be in the repo including tmp files and/or sources (e.g. parquet or CSV files). GitHub has a limit on cloud storage so instead consider adding that data to a cloud object storage location (S3, GCS, Azure).
For any larger changes, we would strongly suggest developing locally to see the effects of that change. However, for smaller changes (add a simple metric, changing the name of a dimension, etc.), some users may prefer to edit directly inline on Github directly.
Deploying Rill
Now your dashboards are fully synced to GitHub, version controled and available to be edited by others. To make the dashboard fully cloud-enabled, you can return to your terminal and run rill deploy. With everything synced, you should now be able to create a new organization within Rill Cloud and push your dashboard to the cloud for shared collaboration. Any future changes should automatically be present in your deployed dashboards on Rill Cloud once committed and new dashboards will appear automatically as well (no deploy command needed). More details on deployment here.
We know that utilizing Git may be new to some - please don't hesitate to reach out to us with any questions and we'd be happy to assist.