Rill Project File
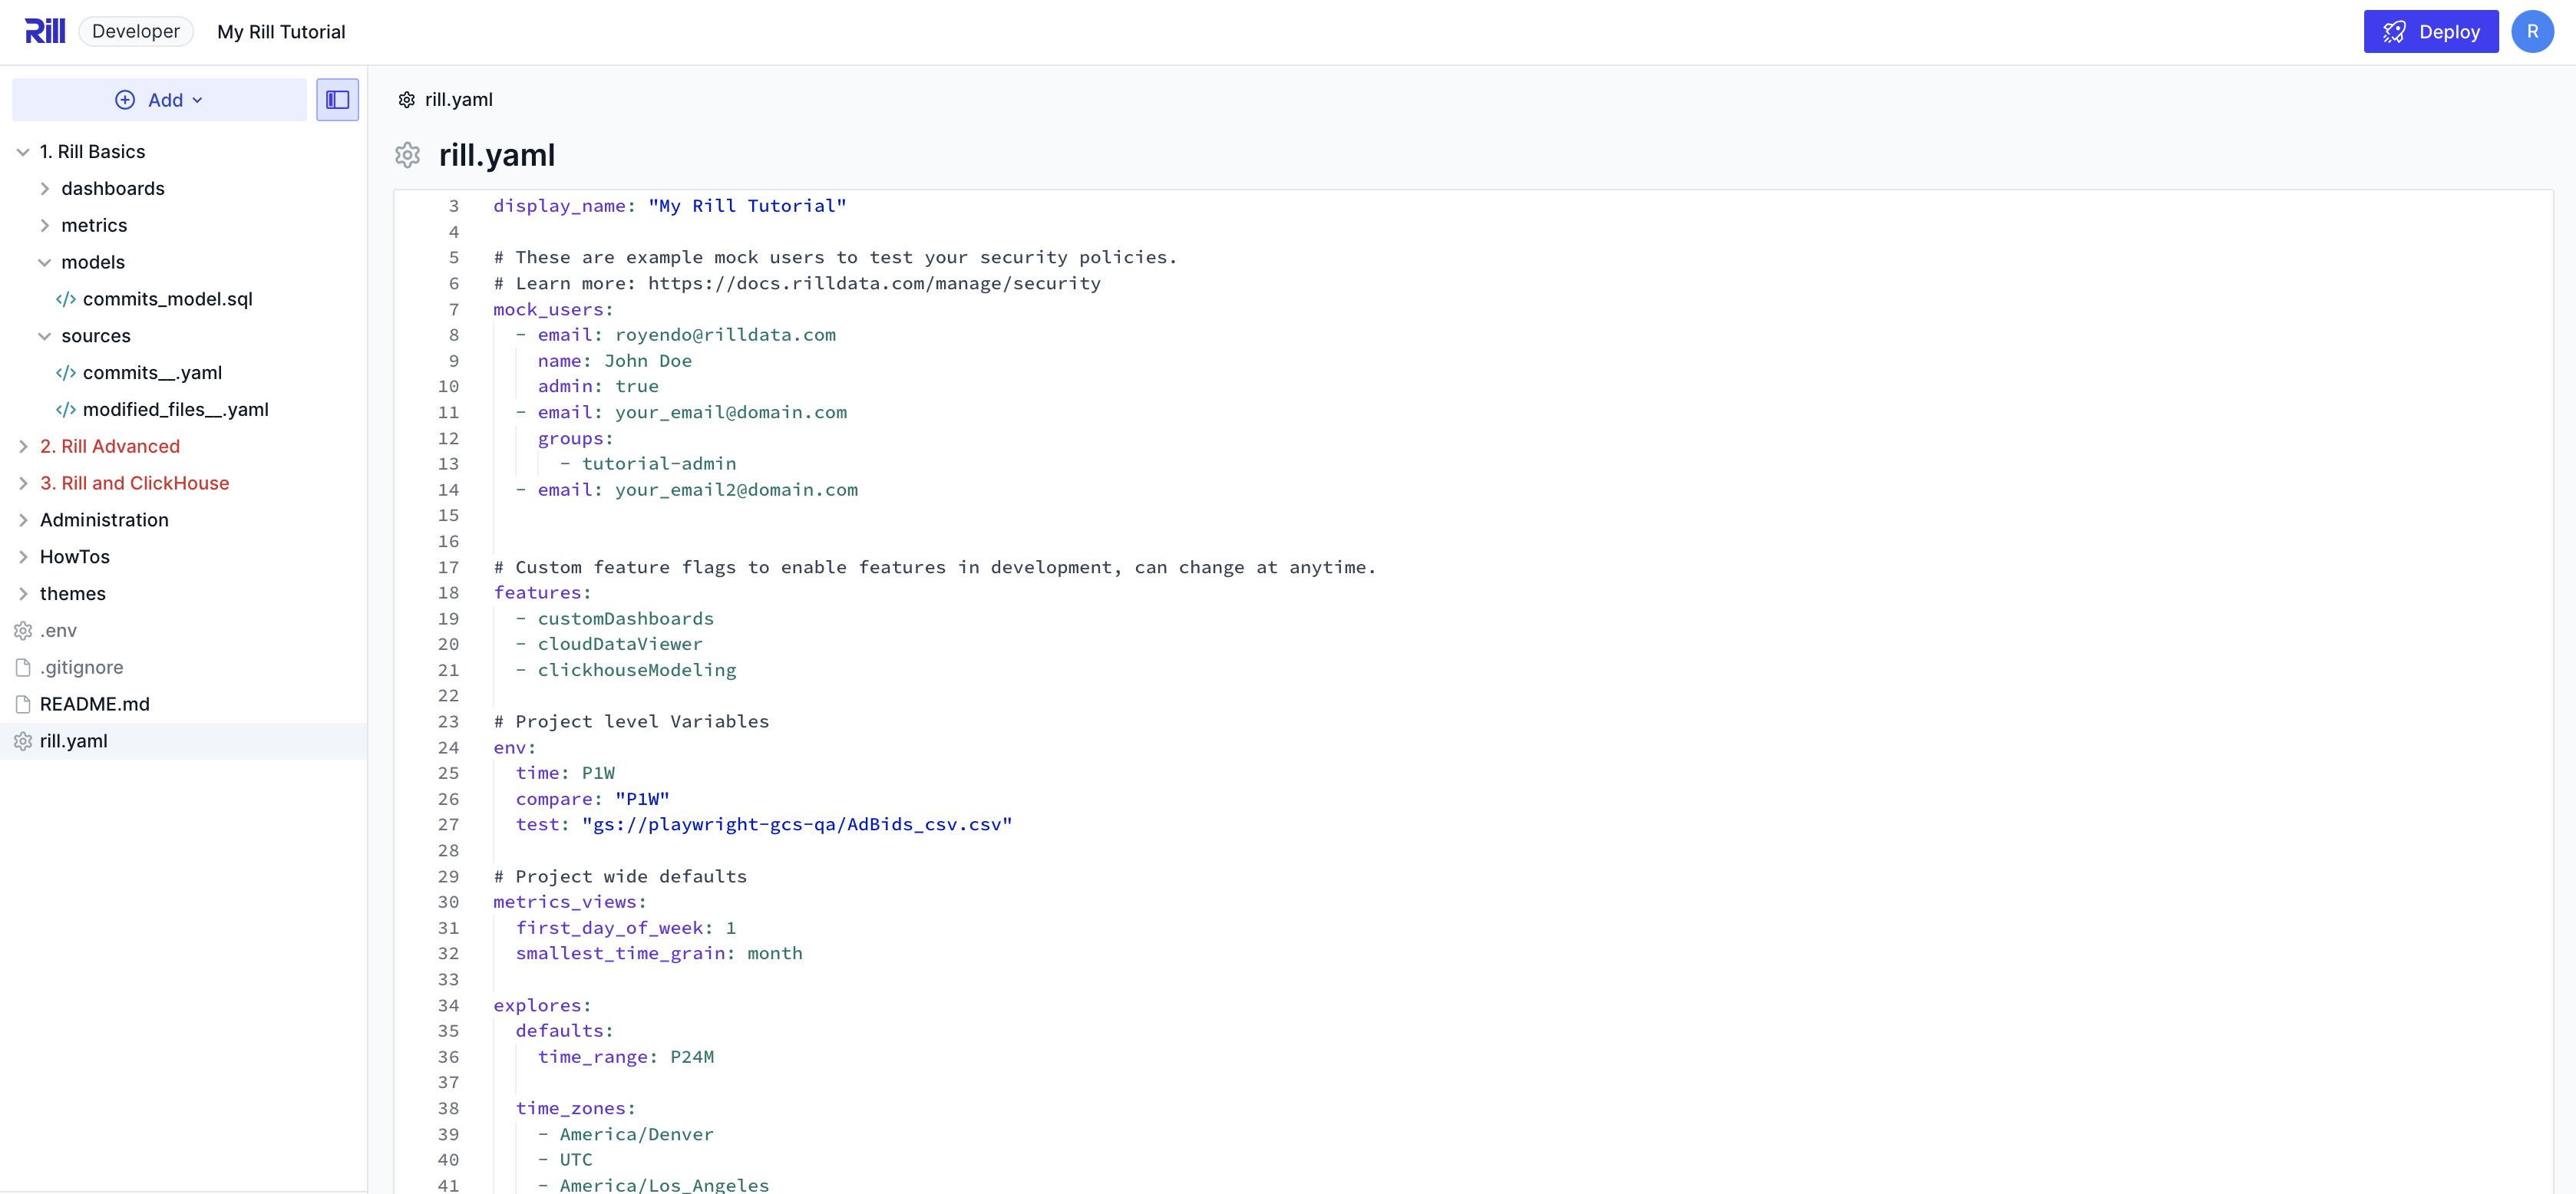
The Rill project file rill.yaml is often overlooked but is a powerful tool, as it sets defaults, environment variables, and connector settings. Let's walk through setting up mock_users to test row access policies, default security settings for your metrics views and explore dashboards, refresh schedules, MCP ai_instructions, and the default OLAP connector.
For a list of all supported settings, see our project YAML reference page.
Model Defaults
Project Refresh Schedule
Set up your project's model refresh schedule. You can override this in the model's YAML file if needed.
models:
    refresh:
        cron: '0 * * * *'
Default dev and prod environments
Rill comes with default dev and prod properties defined, corresponding to Rill Developer and Rill Cloud, respectively. You can use these keys to set environment-specific YAML overrides or SQL logic.
For example, the following rill.yaml file explicitly sets the default materialization setting for models to false in development and true in production:
dev:
  models:
    materialize: false

prod:
  models:
    materialize: true
Specifying a custom environment
When using Rill Developer, instead of defaulting to dev, you can run your project in production mode using the following command:
rill start --environment prod
Specifying environment specific YAML overrides
If you wanted to set a project-wide default in rill.yaml where models are materialized only on Rill Cloud (i.e., prod) and dashboards use a different default theme in production compared to locally, you could do this by:
prod:
  models:
    materialize: true
  explores:
    theme: <name_of_theme>
Default OLAP Connector
When adding an OLAP connector to your project, this will automatically populate with the new OLAP connector. e.g., ClickHouse, Druid
ai_instructions
Use the ai_instructions field to provide information that is unique to your project. This helps the agent deliver more relevant and actionable insights tailored to your specific needs.
What to include:
- Guidance on which metrics views are most important or should be prioritized for your project.
- Any custom business logic, definitions, or terminology unique to your data or organization.
- Preferences for aggregations, filters, or dimensions that are especially relevant to your use case.
Example:
ai_instructions: |
  Focus on the `ad_performance` and `revenue_overview` metrics views, as these are most critical for our business users.
  When possible, highlight trends by region and product category.
  Use our internal terminology: "campaign" refers to a single ad initiative, and "placement" refers to a specific ad slot.
For metric-level specific instructions, ai_instructions can also be applied there.
Mock Users
Access to your environment is a crucial step in creating your project in Rill Developer. By doing so, you can confidently push your dashboard changes to Rill Cloud. This is done via the mock_users in the project file. You can create pseudo-users with specific domains, or admin and non-admin users or user groups, to ensure that access is correct.
Let's assume that the following are applied to the metrics view.
security:
    access: "{{ .user.admin }} OR '{{ .user.domain }}' == 'example.com'"
    row_filter: "domain = '{{ .user.domain }}'"
In order to test both access to the dashboard, as well as the row filter, you can create the following in the project YAML.
mock_users:
  - email: royendo@rilldata.com
    admin: true
  - email: your_email@domain.com
    groups:
      - tutorial-admin
  - email: your_email2@another_domain.com
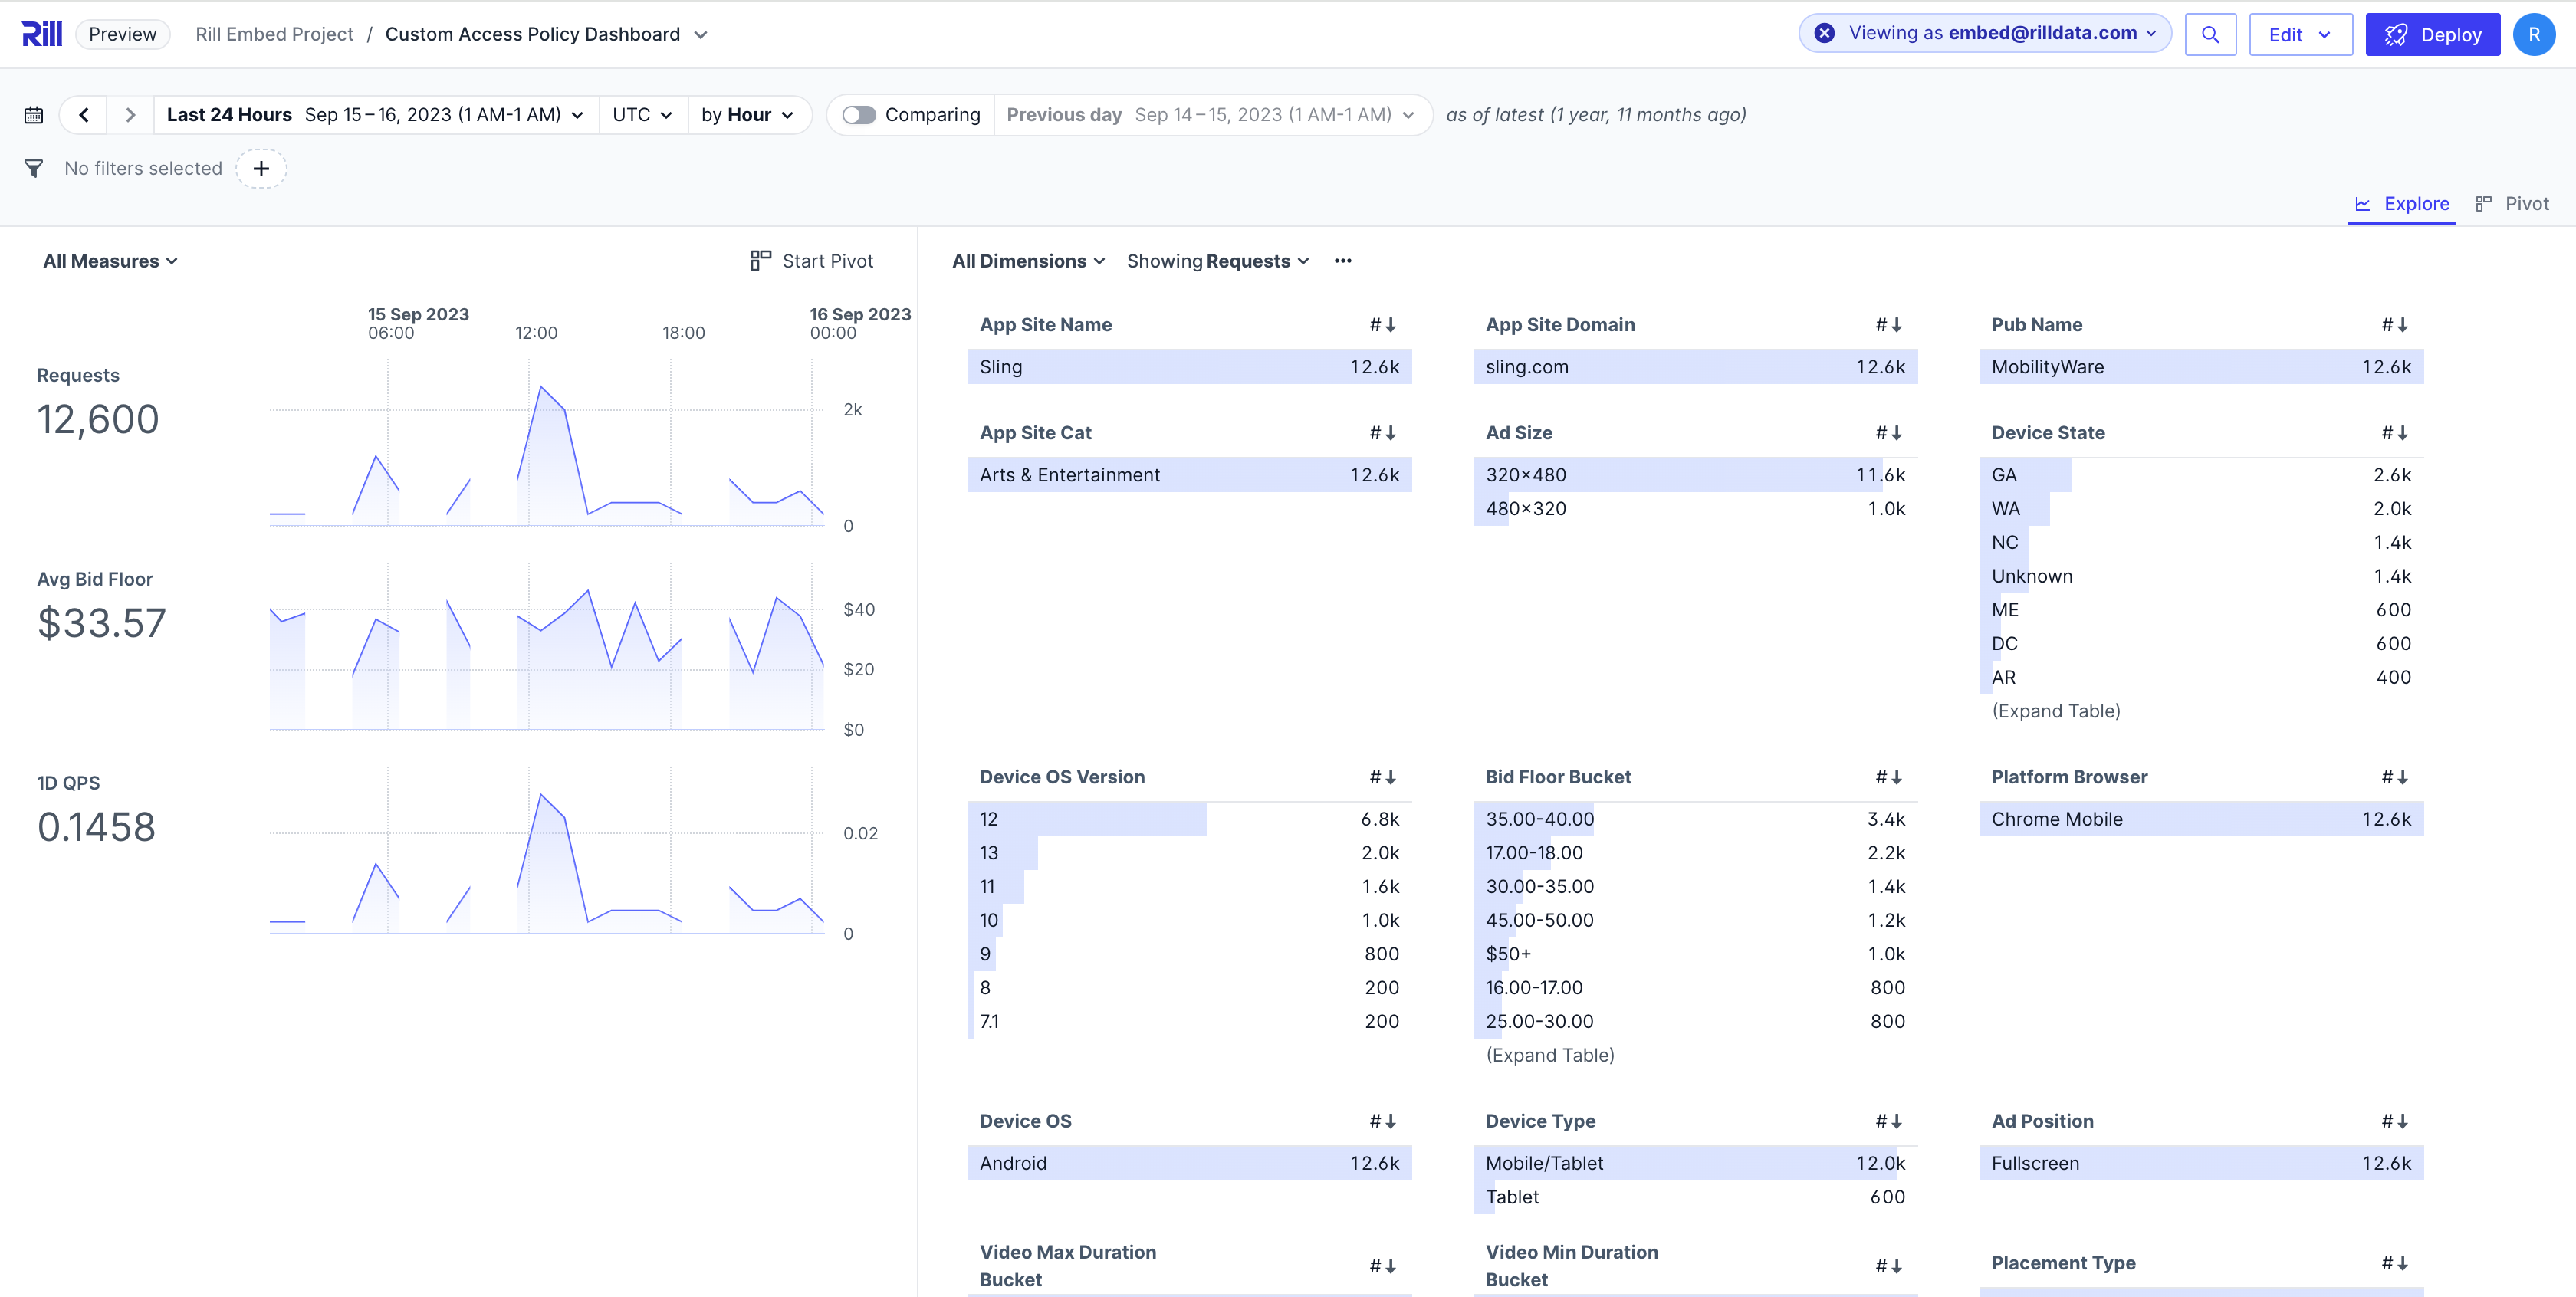
Embedded Dashboard Mock Users
Embedded dashboards are another type of dashboard that you'll want to test in Rill Developer, mainly because there is no way to pass custom variables in Rill Cloud to ensure that access and data are being presented correctly. To do this, you'll need to add the following to your mock_users:
- email: embed@rilldata.com
  name: embed
  custom_variable_1: Value_1 #this is passed at embed creation
  custom_variable_2: Value_2 #this is passed at embed creation
See our Custom Attributes Embedded Dashboard live!
Let's assume a similar setup to the above example. Within the metrics view, we define:
security:
  access: true
  row_filter: >
    app_site_name = '{{ .user.app_site_name }}' AND
      pub_name = '{{ .user.pub_name }}'
Then within the application we are passing
app_site_name='Sling'
pub_name='MobilityWare'
You can create a test mock user to ensure that this dashboard is working as designed with the following:
- email: embed@rilldata.com
  name: embed
  app_site_name: 'Sling'
  pub_name: 'MobilityWare'
Metrics Views Defaults
By default, Rill is open to access (to your organization users), unless otherwise defined. To add project-level access to the Rill project, you can add a default metrics view security policy in the rill.yaml file. Like a metrics_view, you can define the security as shown below. For more information, read our data access documentation.
metrics_views:
  security:
    access: {boolean expression}
    row_filter: {SQL expression}
Other parameters that can be set in the defaults are first_day_of_week and smallest_time_grain.
Rill YAML settings < Metrics View YAML < Dashboard YAML
Explore Defaults
Similar to metrics views, you can set security for an explore dashboard. (Note that only access can be set at the dashboard level.)
explores:
  security:
    access: {boolean expression}
You are also able to set the defaults parameter in the explore dashboard to define your default time range, as well as the available time_zones and time_ranges in an Explore dashboard.
explores:
    defaults:
        time_range: P3M
    time_zones:
        - America/Denver
        - UTC
    time_ranges:
        - PT24H
        - P7D
        - P14D
        - P3M
Rill YAML settings < Explore Dashboard YAML < Bookmarks in Rill Cloud < User Last State